
BeaterCore Getting Started
Prologue, spare tire, hub map, and the first three-heat paycheck.
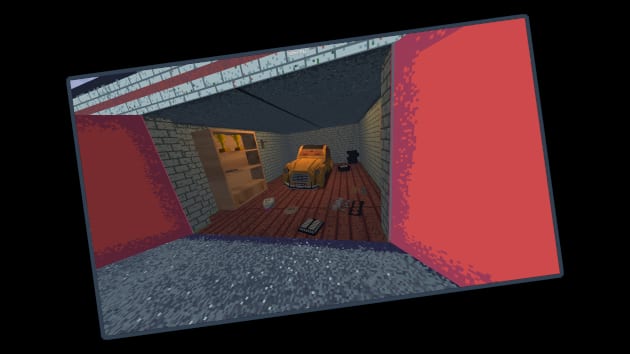
BeaterCore starts in a first-person garage, not on a grid. You own a cheap rusty beater, you wrench it yourself, and then you take that same tired machine into career events. This is the first-hour route after the Steam launch on 9 September 2026: what to click, what to buy, and which purchase empties a wallet that already feels too small.
If you only remember three rules, remember these: finish the prologue once, mount a spare tire before a real event, and pack the trunk for three races, not one. The rest of the wiki — controls, garage repair, field repair — exists because those three rules still fail people on heat two.
Finish the prologue before you skip it
Later builds replaced a dry tutorial list with a story prologue. You can skip it when you start a new save. Do not skip it on the first run. The prologue is where the game teaches interact, walking, and the fact that a worn tire is already waiting on the starter car. Skipping it to “get to the racing” is how you arrive at the hub with no idea why the auto parts store exists.
Walk. Read prompts. Interact is E on keyboard and X on many pads. Sprint with Shift when the garage feels huge. Driving uses W/A/D in the early lessons; the full bind list lives on the controls guide. If a stick drifts while you are still indoors, open the analog properties menu — the tiny button next to throttle and steering — and raise deadzone there. Do not wait until a stage to discover it.
Talk to NPCs when they appear. Boris is the one playtests keep sending you to for advice, and he is also the first face of sponsorships. You do not need to max a relationship in the first hour. You do need to learn that people in this game are not flavor text; they open extra work.
The first garage job
The starter beater already has a tired wheel. Walk up to that corner, press interact, and pull the wheel. Put it down if you need both hands. This is a walking sim, not a pause-menu upgrade screen, which is why garage repair is its own page.
Boris, or the prompt that follows him, teaches the spare-tire rule that saves careers: one spare can sit on the roof, it does not eat trunk slots, and it can auto-mount when you reset during a race. That is not a cosmetic rack. That is a free retry. Keep a spare mounted before you open the hub map for a real event.
You will also be sent to the auto parts store for a replacement wheel. Playtests put that tutorial tire around 500 cash, about half of a fresh wallet. That number is the economy lesson. You are not supposed to buy furniture, a second project, and a full tire set on day one. You are supposed to feel the cost of one corner.
Bring the new wheel back, fit it, and store the old one on the roof if the prompt allows. Then walk the rest of the car: air filter, oil, obvious leaks. You do not need to rebuild an engine in the first hour. You do need to know where the hood opens so field work is not a panic later.
Spend cash like you have half a wallet
The auto parts store is stocked on purpose. It wants you to feel like a catalog. Ignore the catalog. First-hour buys, in this order:
- A replacement wheel if the tutorial one is spent.
- A roof spare if you do not already have the auto-mount.
- Engine oil and a cheap air filter if either is already dirty.
- Nothing decorative.
Garage furniture is real content — later patches even made garages bigger — but shelves do not finish heat three. Rank purchases with the parts tier list if you are tempted. A second project car is almost always a trap while the first one cannot complete an event. This wiki does not invent model names the store has not published; buy the job, not a fantasy badge.
If you are already broke, run a short time trial after a sanity check, then come back. The money and store page is the shopping order after this first hour. Career payouts were raised during the 0.2.1-era balance pass while engine and oil wear were cut. You can earn. You cannot earn if you DNF because you skipped the spare.
Hub map, then the first event
Leave the garage for the hub. The map is a 3D lot, not a menu list. Middle mouse pans it. That bind is easy to miss, and it is the difference between finding the racetrack and walking in circles.
Pick a time trial or a clean event before a contact race. Surfaces still chew tires; other cars chew them faster. Open the track preview and look for the field-repair icon. Many career events run three races with a repair window between heats. That window is why trunk space is the real difficulty slider.
Pack before you confirm:
- Roof spare already mounted.
- Oil if the engine is thirsty.
- Spark plugs or a filter only if you have room after the spare and oil.
- A way to cycle trunk items so you are not stuck on the first slot.
Do not pack decorative junk. Space is limited. Use the field repair page as the loadout sheet; this page is only the warning. Drive like you still owe the bank for that 500-cash wheel. Arcade handling with a more serious powertrain means you can still cook a tire in a pothole. Finish all three heats. A pretty lap that shreds the only remaining rubber is a loss.
What ready actually means
You are ready for the rest of BeaterCore when all of this is true: you can wrench a wheel without opening a wiki, a spare sits on the roof, you can pan the hub and find the store, and you packed for three heats. Career structure, seasons, and sponsorship quests live in the career walkthrough. Ice and autumn dirt change which tire is honest; that is tuning, not a day-one problem.
Local split-screen (up to four, full keyboard support) and online/LAN PvP are waiting when you want people instead of a calendar — see multiplayer. Split-screen is a party mode with free car picks; online races still wear parts the same way career does. Do not mix those rules in your head. If frames hitch in the garage, check system requirements and drop render scale before you blame the car.
BeaterCore is a paid Steam and itch.io racing game by Artem Arbatsky (The HellBox), not a Roblox experience and not a codes hunt. The first hour is a mechanic’s hour. Treat it that way and the arcade races that follow actually pay.
When the fog lifts, your save should look boring on purpose: one tired project, one roof spare, a little oil, and a wallet that survived the auto parts store. If you can walk the hub, buy a single wheel without going broke, and finish heat three with that spare still ready to auto-mount, you have beaten the tutorial economy. Everything after that is optional until something actually snaps — and something will. Keep this page as a checklist; open the other guides when the next failure is specific.
Frequently Asked Questions
Quick answers to the most common BeaterCore questions.
Should I skip the BeaterCore prologue?
Not on the first save. The prologue teaches interact, the worn starter tire, and the auto parts store. You can skip it on a later new game; first-hour steps still start in garage repair.
Why does the tutorial wheel cost so much?
Playtests put it around 500 cash, about half a fresh wallet. That is the budget lesson. Buy the spare before furniture, then pack a field-repair trunk.
What should I buy first at the auto parts store?
A replacement wheel and a roof spare that auto-mounts on reset. Oil is next. Rank the rest on the parts tier list.
Keyboard or controller for the first hour?
Either. Keyboard is fully supported. Set analog deadzone in the properties menu beside throttle and steering; details are in the controls guide.
When should I start a career event versus split-screen?
Finish a three-heat career event with a mounted spare first. Split-screen is a party mode; online races still wear parts like career.